
根据上一章的学习,基本摸清了spring security的工作脉络,接下来就是要动手实践,来实现我们自己的校验逻辑了。
类比上一张的流程,可以得到下面这张图。
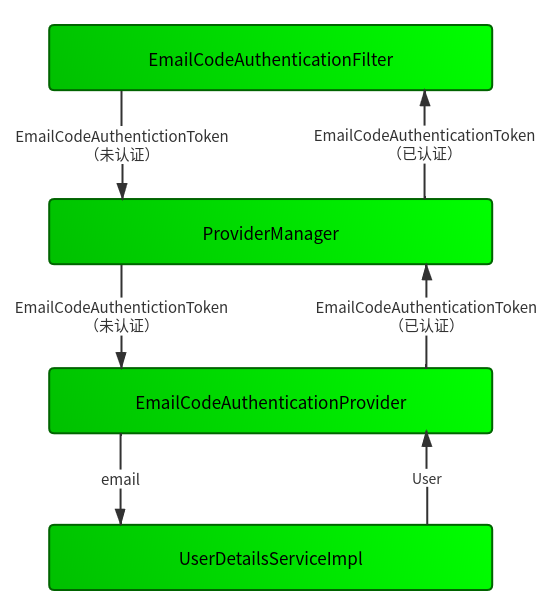
图一
按照依赖关系我们从下往上依次实现。
- 首先实现UserDetailServiceImpl
1 | |
- 由于EmailCodeAuthenticationProvider需要用到EmailCodeAuthenticationToken,所以先实现它,这里我们是仿照UsernamePasswordAuthenticationToken实现的。
1 | |
- 实现EmailCodeAuthenticationProvider
1 | |
- 实现
1 | |
当然校验逻辑可以单独封装成一个Filter对请求进行处理。
当我们完成这一系列的代码以后,要怎么将这些逻辑串联起来呢?
- 这就到了我们的最后一步,完成配置信息
1 | |
这一步将我们实现的代码串联起来,但是并没有真正发挥作用,我们还需要在另一个配置文件上使用这一配置
1 | |